We offer two different ways to add customized content to your websites. The screenshots below pertain to single property websites but the instructions are nearly identical for agent websites.
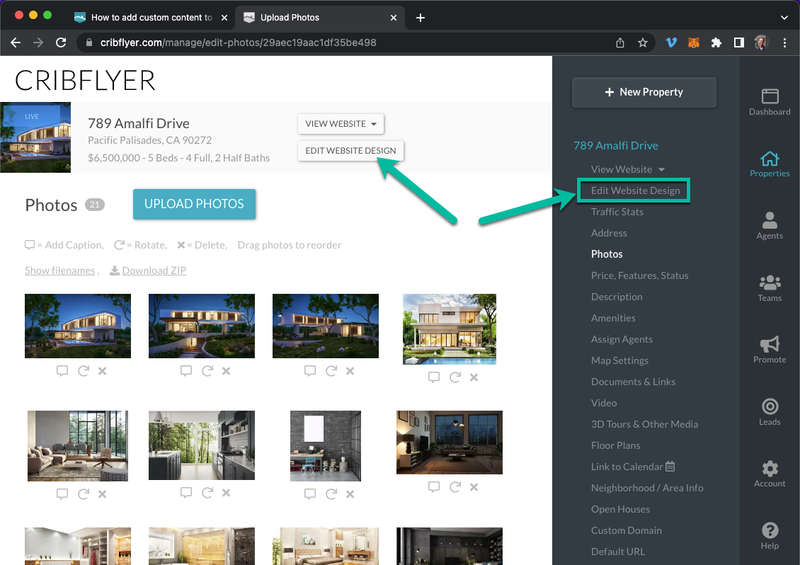
1) Click the Properties icon on the right menu bar. Then click the desired property.

2) Navigate to the Edit Website Design screen of the property. The button or the link pointed out in the screenshot below will take you there.
3) From the Edit Website Design screen click the Design & Layout button to open the sections menu.
Then click the Add Sections button.

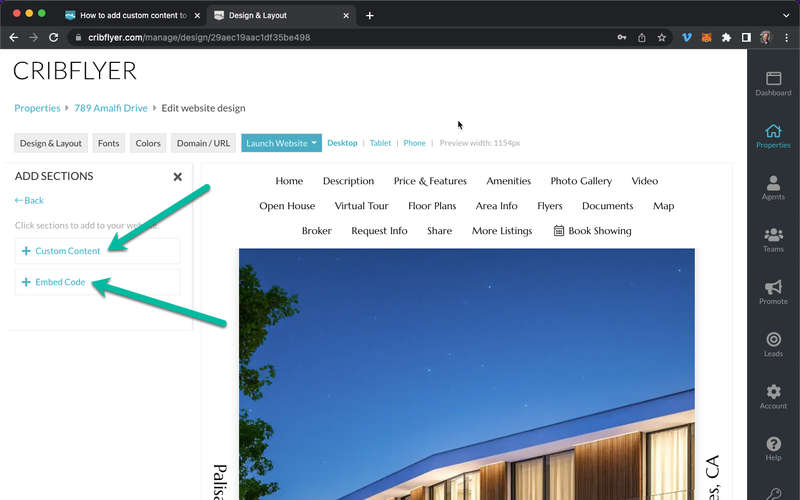
4) The Add Sections menu has 2 types of custom content sections you can add.
The first button labeled Custom Content lets you choose from several basic layout templates where you can enter custom text and/or images. If you're not familiar with HTML coding we suggest you choose this option.
The second button labeled Embed Code lets you enter custom HTML code. This option gives you more flexibility but requires knowledge of HTML coding. If you'd like to add custom HTML/CSS code or an embed code snippet from a 3rd party you should choose this option.
Steps 5-8 below explain how to use the "Custom Content" option to enter basic text and image content. If you'd like to add custom HTML/CSS content then skip ahead to step 9.
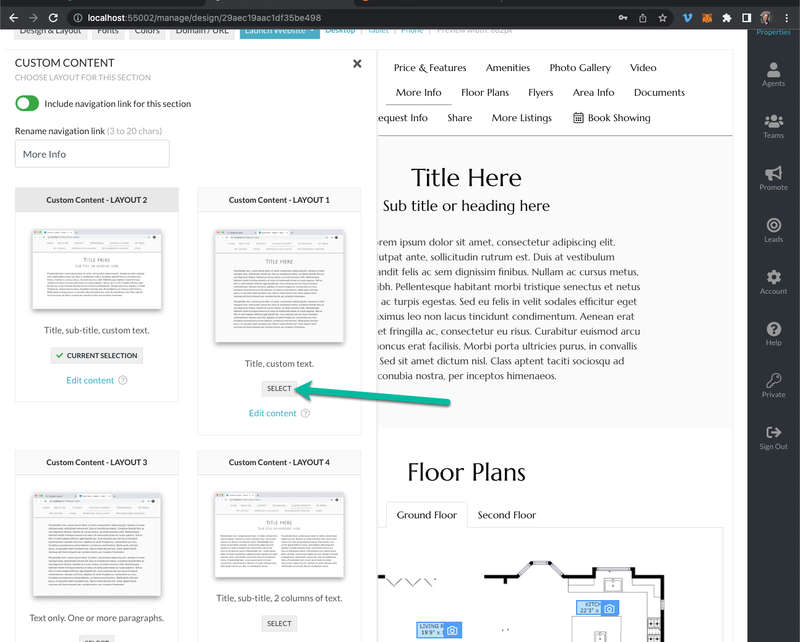
5) Click the Custom Content button shown in the screenshot above. This adds a new custom content section to your site, reloads the preview frame, and opens the content options menu.
6) Next, rename the navigation link to describe the content you're adding. Or you can choose to disable the navigation link which removes the link that jumps to this section from the main navigation bar at the top of the page.
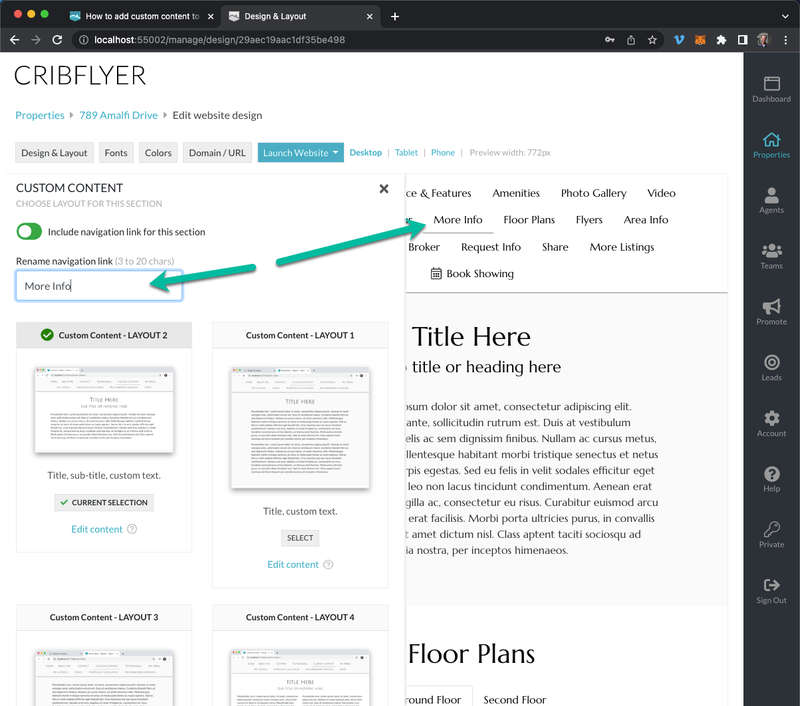
7) Next, choose a desired layout from the template options by clicking it's Select button. This will update your new section's layout template, reload the preview frame and open the Edit Content menu.
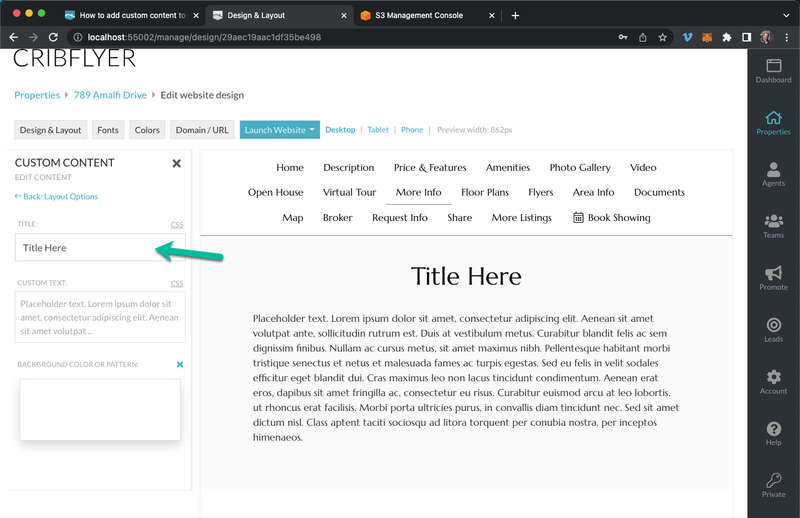
8) Use the fields shown on the Edit Content menu to customize the new section as desired.
The following steps explain how to add custom HTML content to your site.
You can also use these steps to embed content from a 3rd party that was given to you as an HTML/CSS/JS code snippet.
9) Repeat steps 1-4 above to open the Add Sections menu.
Then click the Embed Code button. This adds a new custom content section to your website, reloads the preview frame, and opens the content options menu.
10) Next, rename the navigation link to describe the content you're adding. Or you can choose to disable the navigation link which removes the link that jumps to this section from the main navigation bar on the top of the page.
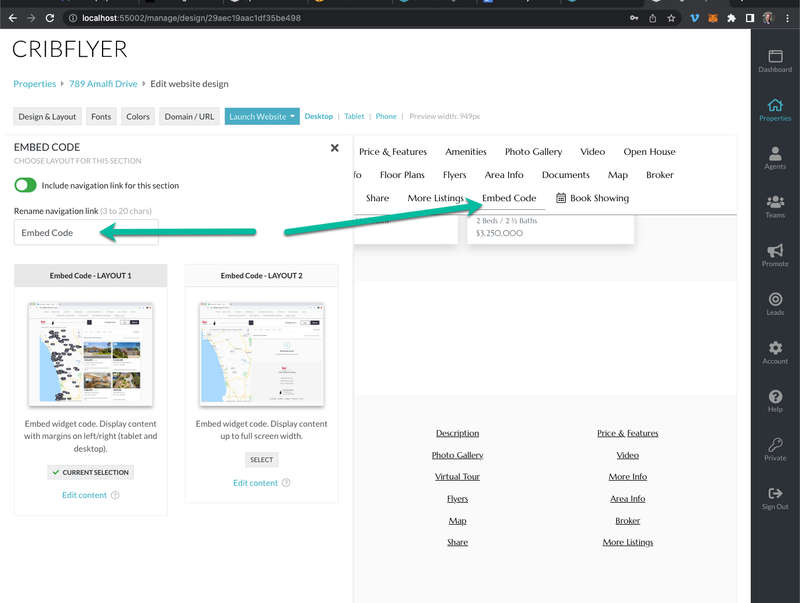
11) Choose a desired container layout from the template options by clicking it's Select button. The only difference between the two options is the size of the left and right margins around your custom HTML content.
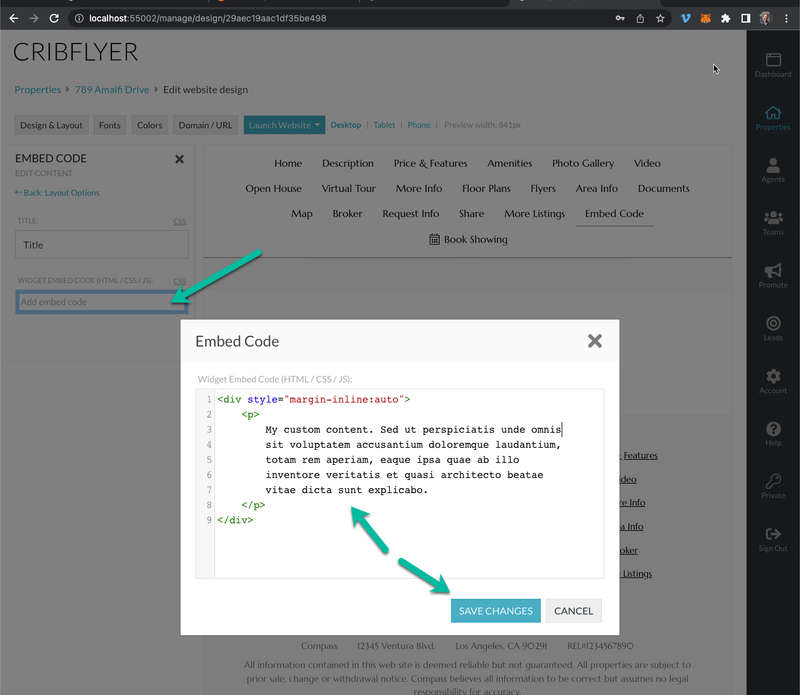
12) Click the Edit Content link to open the edit content menu. Use the fields shown on the Edit Content Menu to enter HTML and customize your new section as desired. Save changes to reload the preview frame.